


Related news
How to Hide Brad Nail Holes Before Painting or Staining Wood
To hide a hole left by a brad finish nail, set the nail slightly below the surface without crushing the fibers, remove dust, press in a compatible filler, let it dry, and sand the repair level. Paint and stain then require different checks: paint can cover a smooth primed patch, while stain may reveal a mismatch in color or texture. Qinjia supplies metal fastening products for woodworking, construction, and installation; buyers can review its range on its website before matching the nail to the material, nailer, and finish.
Why Do Brad Nail Holes Show After Finishing?
A Small Hole Becomes More Visible on a Smooth Surface
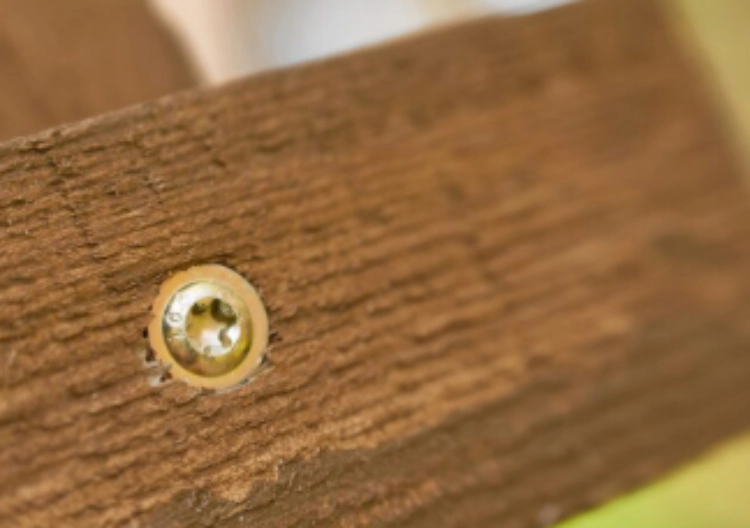
A brad finish nail leaves a small entry point, but finishing can emphasize it. Side light catches a shallow depression, a rough filler edge reflects differently from sanded wood, and stain may deepen the color around disturbed fibers. The repair therefore includes both the recess and the surrounding surface. Controlled driving depth, clean fibers, and a finish-specific filling method are more dependable than trying to conceal a poorly seated nail at the final coat.
The Wood Finish Changes the Repair Method
Paint hides the grain and gives primer and topcoat an opaque base, so the main goal is a flat, stable patch. Stain leaves the grain visible and can expose differences between filler and wood. Anyone learning how to fill brad nail holes in wood should test the filler, stain, and clear coat together on an offcut or hidden area. Judge the result only after the complete finish sequence has dried.
The Nail Choice Affects the Starting Surface
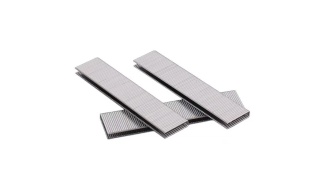
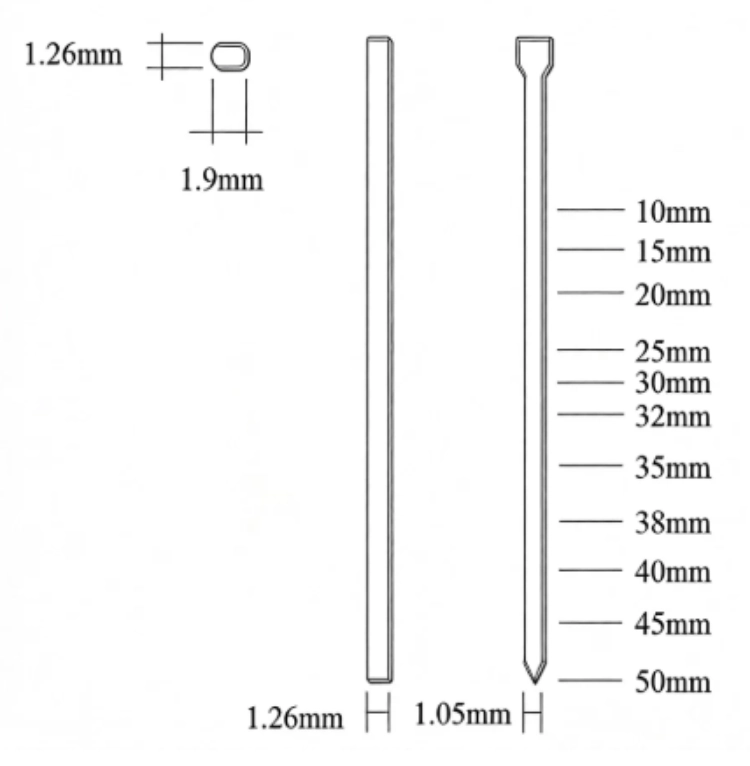
Brad nails are intended for furniture, frames, joinery, and decorative finishing rather than load-bearing connections. The 18GA F Brad Nails range supports that product direction. Qinjia lists 18GA sizes from 10 mm to 50 mm and 16GA sizes from 25 mm to 64 mm, using low- or medium-carbon steel with zinc-plated or copper-plated finish options. A brad finish nail still needs a gauge and length compatible with the nailer and material thickness. Excess length can mark the back or complicate seating, while insufficient length may not hold the assembly as intended.
How Should You Prepare Brad Nail Holes Before Filling?
Check the Nail Depth and Remove Raised Fibers
View the surface under side light and pass a clean fingertip or flat edge over the entry point. The head should sit below the face, but the recess should not be deeper or wider than necessary. Carefully trim or press down loose fibers before filling. This inspection establishes whether the hole is stable enough to accept a small repair without spreading filler across the grain.
Remove Dust Before Applying Any Filler
Dust can weaken contact between filler and the sides of the recess and may leave a gritty edge after sanding. Brush or vacuum the area, then wipe it with a clean, dry cloth if appropriate for the material. Do not introduce moisture unless the filler instructions call for it. A clean hole also makes shrinkage easier to see, so a second thin application can be added only where needed.
Choose Filler for the Final Finish
Select wood filler before painting by checking that it suits the wood, sands to a firm edge, and accepts the planned primer and topcoat. For stain, use a product intended for that finish or consider a color-matched putty at the stage directed by its instructions. Product labels and sample results matter more than the generic word “wood.” Wet filler can also change color as it dries, so do not judge the match too early.
For repeatable finish work, record the wood species, Brad nail gauge and length, filler or color-matched putty, primer or stain system, drying result, and final inspection under angled light. Keep the approved sample with the job record so a second worker can reproduce the same repair method.
What Is the Best Way to Hide Brad Nail Holes Under Paint?
Press in a Small Amount of Filler
Use a small putty knife or flexible spreader to press filler into the recess. Leave a slight excess, then draw the tool along the grain without coating a wide area. A large mound increases drying and sanding work and can create a flat spot around the repair. Keeping the patch narrow is a central part of finish carpentry surface preparation because the surrounding wood should remain as undisturbed as possible.
Let the Repair Dry Before Sanding
Follow the filler’s drying guidance and check the center rather than assuming a dry surface skin means the entire patch is ready. Early sanding can pull material from the hole or smear it into the grain. Once dry, use a fine abrasive and light pressure until the patch is level. Inspect from several angles; a repair can feel smooth while a work light still reveals an edge or hollow.
Prime, Inspect, and Apply the Topcoat
Primer creates a consistent base for paint and makes small defects easier to see. After it dries, inspect the nail line for shrinkage, ridges, or texture changes, and correct them before the topcoat. The same planning used to select the right brad nail length for different trim tasks supports the repair: a suitable brad finish nail driven to consistent depth leaves a more manageable starting surface.
How Can You Hide Brad Nail Holes Before Staining Wood?
Test the Filler on the Same Wood
To hide nail holes before staining, use an offcut from the project when possible. Apply the proposed filler, sand it, and follow the full stain and clear-coat sequence. Compare the dry sample with the surrounding wood from the expected viewing distance. If the filler will not accept color evenly, a compatible color-matched putty may be more suitable. The result depends on the wood species, grain, filler, stain, and surface preparation.
Sand Without Erasing the Surrounding Grain
Level the repair without creating a pale, polished, or flattened halo around it. Keep the abrasive centered on the filler and blend outward only as required. On visible trim, prepare the rest of the face consistently so one spot does not receive noticeably different sanding. Remove the dust and inspect under angled light. Scratches that seem minor on bare wood can become conspicuous after stain adds color contrast.
Plan Nail Placement for Future Repairs
Good finish carpentry surface preparation begins during installation. Keep the nail line consistent, avoid driving too near an edge, and choose a length that holds the joint without unnecessary penetration. When using 18-gauge brad nails on trim, stable tool position and repeatable depth reduce the variation that must later be filled. A predictable nail line also lets another worker inspect every recess before stain is applied.
Conclusion: A Clean Finish Starts With Controlled Nailing
Prepare the Hole, Not the Whole Board
Remove raised fibers and dust, then press in only enough filler to level the entry point. Excess material expands the sanding area and increases the chance of changing the surrounding grain. A carefully seated brad finish nail keeps that repair small from the beginning.
Paint and Stain Need Different Expectations
Use wood filler before painting to create a smooth surface for primer and topcoat. To hide nail holes before staining, test the filler and full finish sequence on matching wood because color and texture remain visible. The same filling product may not produce an acceptable result under both finishes.
Select the Brad Nail Before You Repair It
A brad finish nail should match the material thickness, nailer, holding task, and final surface. When selecting 18 gauge brad nails for trim, include planned seating depth and hole repair in the installation method. Consistent placement limits the number of filling and sanding variables at the finishing stage.
Contact Qinjia About Brad Nails
Share the Material and Finish
Describe the wood, thickness, trim or furniture use, and whether the final surface will be painted or stained.
Confirm Gauge, Length, and Tool
Provide the nailer model or type and the required gauge and length so compatibility can be discussed clearly.
Discuss the Suitable Product
Use the Qinjia contact page to discuss Brad nails for the stated finishing or joinery task. For distributor or project purchasing, include wood thickness, nailer type or model, gauge, length, surface finish, pack format, and sample requirement. Qinjia can align confirmed product information with material or inspection documents and OEM requirements; the final choice should remain tied to the tested tool and finish system.
FAQ
What Is the Best Filler for Brad Nail Holes Before Painting?
Use a filler that is compatible with the wood, sands level, and accepts the planned primer and paint. Press a small amount into the clean recess, allow it to dry fully, sand lightly, and inspect after priming. Test first if the wood or finish combination is unfamiliar.
How Do You Hide Brad Nail Holes Before Staining?
Test a stain-compatible filler or matching putty on the same wood, including the planned clear coat. Keep sanding local to the repair, remove all dust, and compare the dry sample with the finished surface. Stain can reveal differences in filler color, absorption, grain, and sanding texture.
Does a Brad Finish Nail Work for Load-Bearing Connections?
No. A brad finish nail is intended mainly for furniture, frames, joinery, and decorative finishing, not structural connections. Select a fastener from the connection, substrate, tool, and load requirement rather than substituting a finish nail because it is convenient to drive.

 Consult
 Whatsapp
 Leave Message
 top
top